Friday, April 30, 2010

From the inside out!

After long debating with myself on if I should or shouldn't do an inside of the cockpit, 
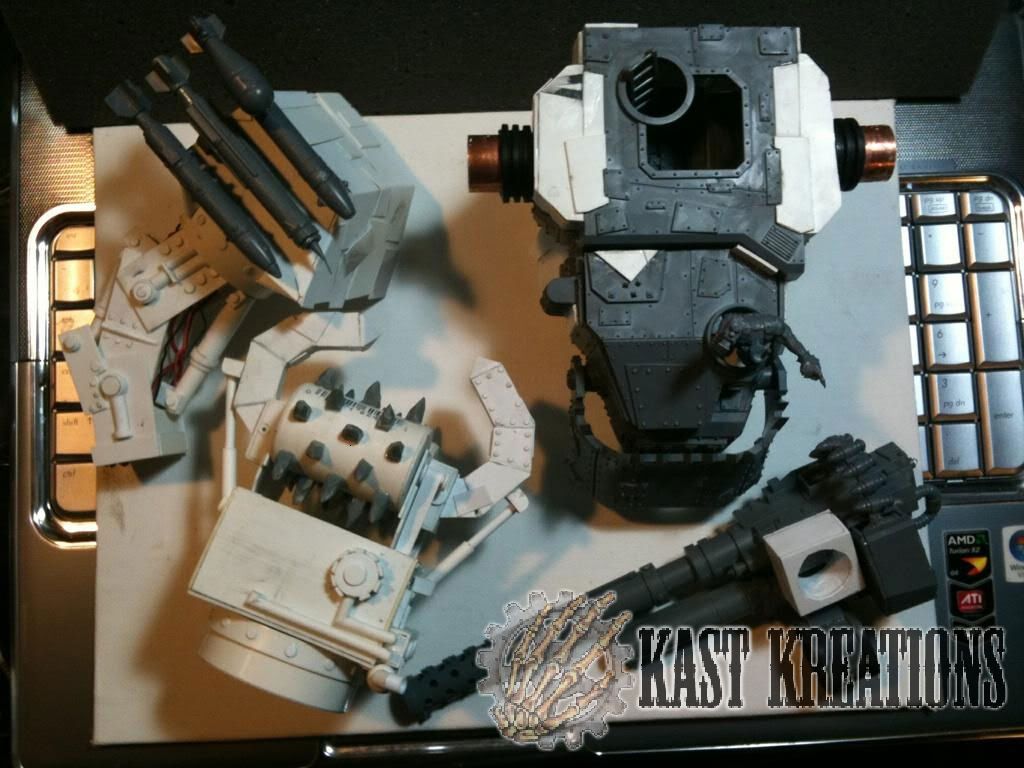
be cheap and just leave it completely blank on the inside. I decided to go with setting stuff up inside so the top could be removed to show off all the orkies working to kill something. First I used some resin doors my buddy over at Bossmans's Bitz Box gave me to seal off the cockpit from the rest of the head. then using some wire and plastic card tubes did some other details here and there to give it more of a cockpit feel, since the inside of the battle wagon wasn't intended on being seen for the most part. 
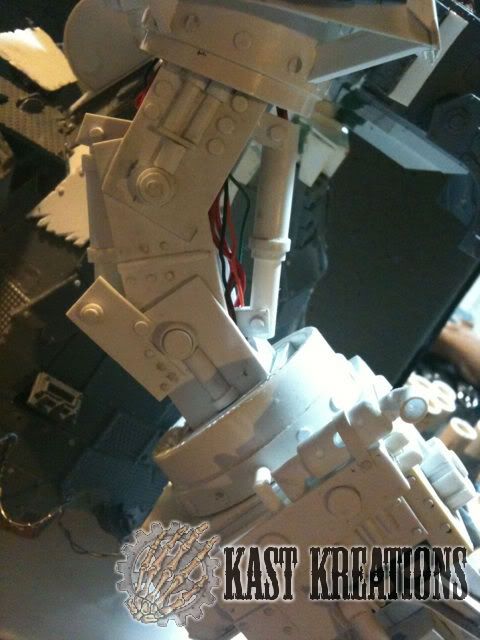
After working around with the plastic card and tubes to give it a better feel I started work on the driver, or what might still end up being multiple drivers, haven't fully decided yet. The best choice I decided was to use the driver from the GW Ork Trukks. Now thankfully while experimenting with silicone and resin for the first time, I ended up making a mold of that exact driver! Which was fantastic because I didn't have any extra drivers laying around in my bitz. 
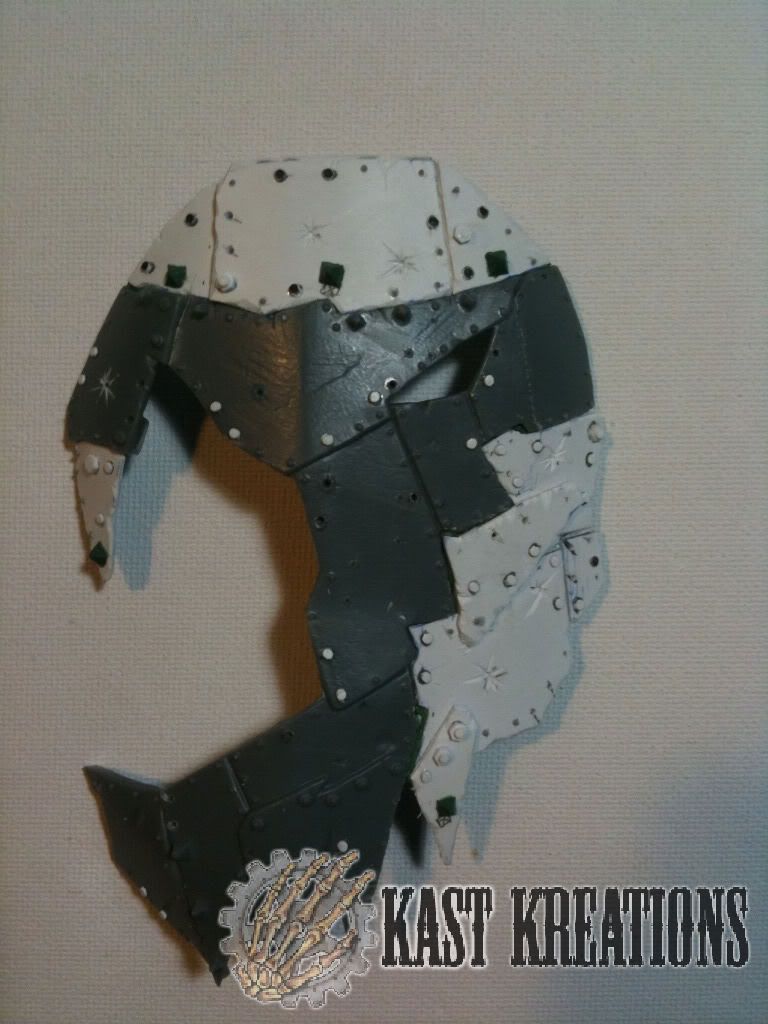
Using the resin driver I was able to convert him into an awesome Stompa driver! I then realized the back of the head was kinda lame, didn't have anything on it at all and needed something to make it stand out a wee bit more, or at least blend more with what was going on. So I added some tubes, two smoke stacks and a gobbit that I thought looked pretty neat there. Well that just about catches you guys up on my Stompa project, I will be working on it a lot more this weekend and will hopefully get some more for everyone to see. Once again if you have any ideas for awesome conversions please shoot me an e-mail, I'd love to get some input as well!

Signing Out,

Shawn

Thursday, April 29, 2010

Stompa continues!

Thankfully when I was working on the project, I pre-thought out the idea of making it easy to transport. I made the head, and arms completely removable. After showing it off to a few people I was given the idea to use that for more then just transport. I have already started working on different arms and claws that could be swapped out to give the Stompa different equipment such as more shootas or even a large deff rolla to squish anything that gets in the way of my over-sized monster. The other arm at this time is just a mildly modified version of the guns that came with the GW Stompa kit I still have to build a whole left arm that is much more detailed and not as "weedy". Also another big issue i was have is the front of the Stompa was looking way too bland without the belly gun, I wanted to give it something to really show off the fact that they were badmoons, I figured the easiest way to do that was to make a huge belly plate that would go on the Stompa when the gun wasn't being used. First I took the faceplate that was supplied in the GW kit, cutting two of the plates off in order to get the shape I was looking for. After cutting those out I mocked up and started attaching different shaped plastic in order to get the exact shape I wanted for this belly plate. Which of course was a moon, that was the easy part, the hard part was trying to get the plates to blend with the original plastic bits from the plate. After some green stuff, rivets, and one by one slicing off some of the bits from the stock plate using them to help with the blend. This is the same thing I did with the plates that covered the arm holes. Tomorrow I plan on doing some work with the cockpit and head. Please stay tuned and check out all the goodies to come! Remember, If you have anything you want see converted, feel free to e-mail me!

Signing out,

Shawn

Putting the stomp, in Stompa!

I'v decided the first of my creations I will be showcasing is my Converted GW Stompa. After seeing a few of them built, I had come to the conclusion that it just wasn't good enough the way it was. Sadly I didn't take picture's of the start of my Stompa, but I'll fill you in. First I assembled the body as the instructions said. This wasn't the part of the Stompa I had issues with. I then proceeded to fill the gaps where the arms would of gone with plastic card. Blending the shapes to make it appear correct when it came time for paint. I also reworked the neck using PVC pipe so I could attach the GW Batttlewagon as the head. This mod was seen in March 2009's issue of White Dwarf. I also decided the arms that came with the Stompa were now way too short to be used with the conversion and scratch built my own. I am going to apologize ahead of time for the quality of these starting pictures, I had no idea how to take picture's of my miniatures at that point. I took the time to cut out the center plate and magnetized it or order to be taking off and on, replacing it with the belly gun if needed. You can see from the picture's at this time the smoke stacks that came with the Stompa had been used. Later on in the conversion those were removed and replaced with a different style of backing I had scratch built. I spent way too many hours trying to figure out what to do with the scratch built arm. I didn't want to do the normal everyday chainsword. That had gotten done over and over again, even scratch built ones all looked too bland to me by this point. i decided to go with something a little different. the pinchers and the grinders were a perfect way to get the looking i was going for in addition to being fulling functional in battle, grabbing up enemies of all shapes and sized and forcing them into the rollers grinding them into a fine paste! Just how the warboss used to make! I added some detailing here and there, some pipes, an exhaust, and some wires just to give it a decent and real feel. The only other issue I was having was with the head itself. It was way too long, since it was originally a vehicle I chopped it down shortening the head and giving it more of an ork appearance. My thoughts are that if an ork mek had to make a giant robot, chances are he would make it to look like himself as much as possible. The nextorder of business was replacing those smoke stacks with something that has a little more detail, I wanted the back to look as if thats where the engine was, not locked inside where no one could see what was going on. After building the turbines I still haven't exactly decided how they are logically supposed to work. But I liked the way they looked and decided to stick with it. It looked kind of steampunkesk. I also added two levels to the back of the Stompa in order to give the back a little more detail including a door on the top level so they can get to the engine from the outside if need be. Well I think that is enough for right now, I will be back later today most likely to post more about my GW Stompa!

Signing out,

Shawn

Tuesday, April 27, 2010

Welcome!

What's going on everyone!? Welcome to Kast Wargaming, where I will be posting all of my wargaming based projects! I finally got some time to port over some of my posts from my main blog into this one, I will be taking some time out of my busy work weeks to finish a bunch of projects and get them here ASAP so stop back soon!

-Shawn